
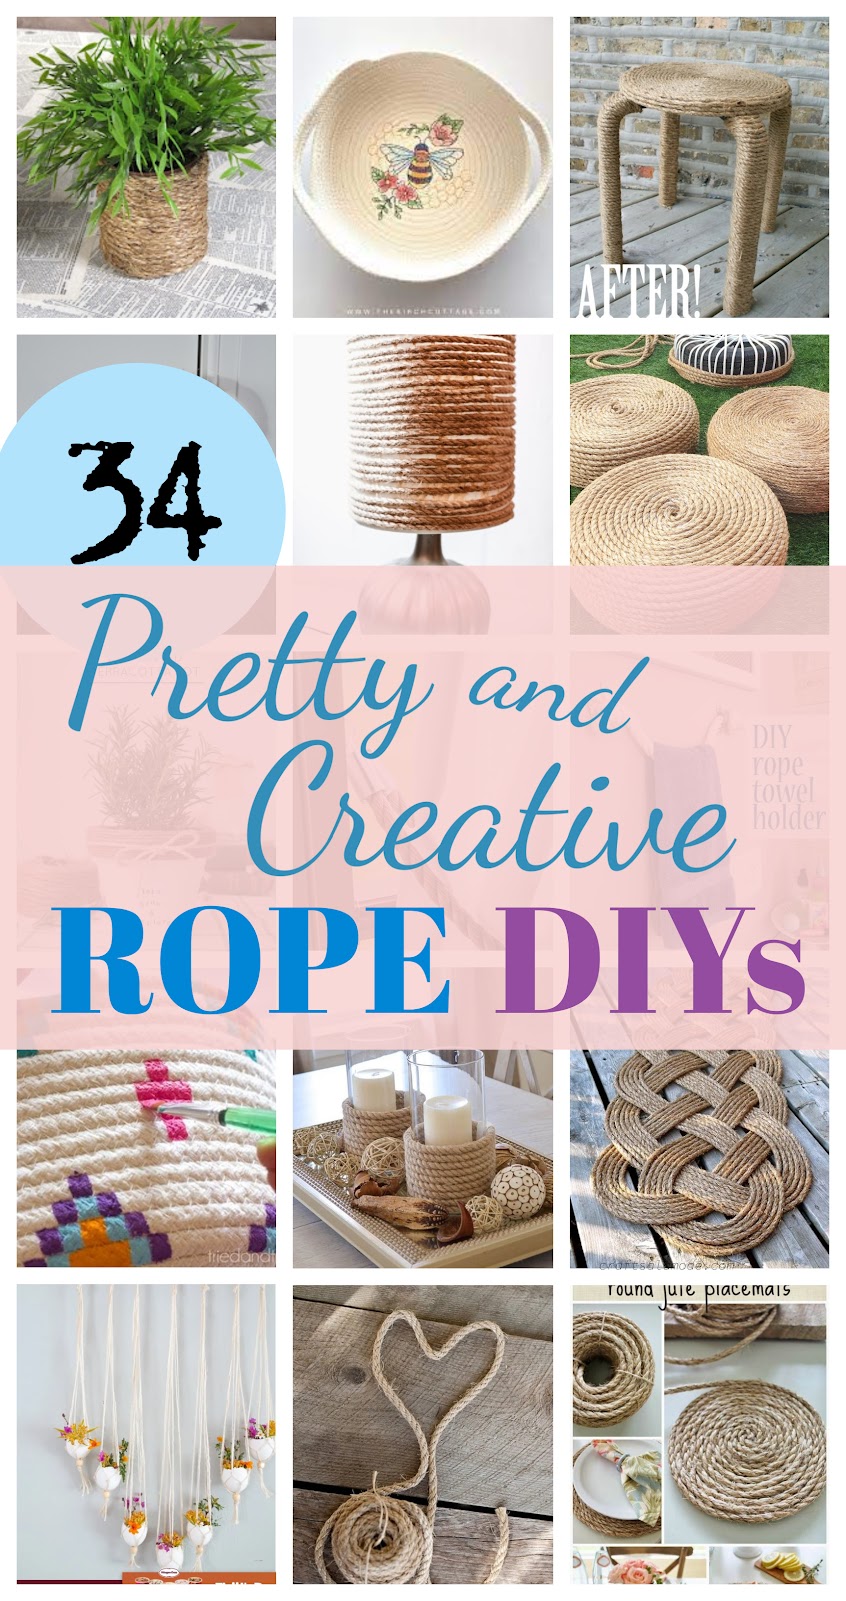
Paper Flower Wall Art for Under FIVE DOLLARS!!
You know those really awesome tissue paper flowers you've been seeing around the blogs? They are beautiful for parties and all kinds of fun occasions but I wanted to make those pretty flowers a part of my everyday decor.
This pretty picture costs less than $5. to make!


First I made the flowers.. a whole bunch of them AFTER I went and bought enough colored tissue paper to make about 500 flowers. :) It was fun shopping for the tissue paper. Anyway, once I got the hang of making the flowers, I could pump them out in no time.
I cut 12 sheets of tissue paper 11" x 24" for each flower. That number of sheets makes a very full and fluffy flower. It's easy for kids to make these flowers, too. My 6 year old grandson made a whole bunch of flowers to bring back to his Mom in Pennsylvania (my son was visiting for a few days with his 2 sons - isn't family great?).
12 sheets of tissue paper cut to 11" x 24" in varying colors. I like only putting 2 colors with each flower. I made this flower 2 different shades of blue and white.

I scalloped the edges of the long side of the paper.


Then I put them altogether evenly and started folding back and forth like I was making a fan.


I used chenille stems (pipe cleaners) to secure the folded paper in the middle. I first used string but found that the pipe cleaners held the flower more firmly and gave a stronger "stem". The "stem" is on the underside of the flower.

Gently pull the top tissue paper away from the rest of the tissue paper. GENTLY or it may tear (don't ask me how I know this).

Keep pulling layer after layer up and into the middle. You can see the flower starting to form. It's so pretty. I love these things.

When all of the paper has been pulled out it makes a pretty flower.

I flattened the back of the flower because it will be glued down onto a canvas board or other support.

For one of the flowers I made I bought a 12" x 12" canvas board and covered it with fabric. I stapled the fabric onto the canvas and made square corners so the edges would look neat, too.
This is the one I made for my Mom.


But the one I made for myself I used an old wooden Christmas sign I was so done looking at. So that was zero cost. HA!
Here is the Christmas sign being covered with fabric. I used a piece of fabric 18" x 18" to cover the sign using a hot glue gun. I used the hot glue gun to apply the flower to the wrapped board also.


All this is very simple but in the end you have a really cute decor picture to hang on your wall!! And just in time for Spring! YAY.
I hope you make one. If you do, come and share it on my FACEBOOK PAGE - give me a like while you are there, that would be nice. :)
I love finding and sharing from all over the net and right now I'm sharing Spring inspiration and all things for the home!
Hi, I'm Linda and I am the writer, crafter, and chief-cook-and-bottle-washer of this blog. Hope you will join me for some fun and it's all about fun. What if the Hokey Pokey IS what it's all about?


No surprise here! You took paper flowers and made them even more beautiful by hanging them on the wall!! Pretty beautiful, my friend, and so reasonable you can change them out whenever you wanted to! Love it!
ReplyDeleteCreative. Thanks for sharing on Small victories Sunday Linkup. Pinned to our Linkup board. and hope you join us again.
ReplyDeleteI love this and so easy and cheap,but looks so nice to dress up any room..Thanks for sharing. I can't wait to get started,my 12 year old grand daughter will love to do this one with me.
ReplyDeleteThese are so adorable! I would love to make a bunch of these and put them in a vase or something similar.
ReplyDeleteWonderful! And you make it look so easy for us to do!
ReplyDeleteYou’re doing a remarkable process. Hold it up
ReplyDeleteyour submit is very exciting to examine.
ReplyDeleteThanks for providing such blogs.
ReplyDelete