
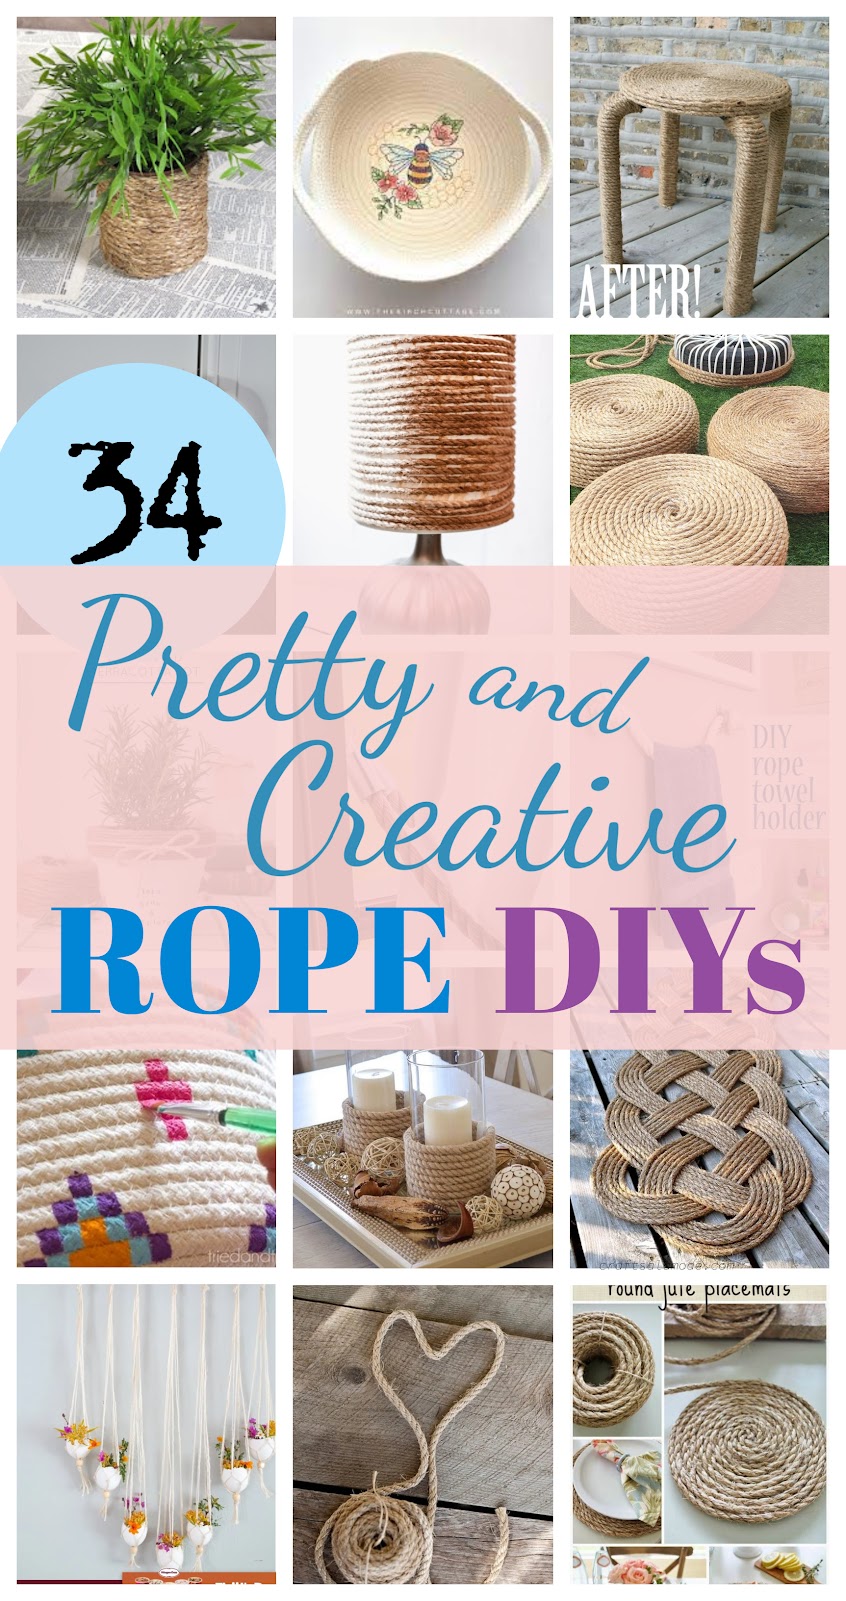
By Laura @ The Greenhouse
I've always admired the Living Succulent Picture Frames, but I'm not very handy with building items. I seem to lack the measuring correctly gene. Sooo.... Here's how I got by the actual building part and made myself a live piece of art!
My mom had given me a scrapbook frame that she didn't want, and of course I thought how perfect it would be for my project. It would have been easier to use a shadow box, but this scrapbook frame was free. Life on The Balcony is a website that I found that has a nice tutorial on how to make an actual Succulent Picture Frame.
So this is how I made my really quick and easy Succulent Picture Frame. First I filled the frame (the glass side on the bottom) with cactus palm potting soil.
.jpg)
.jpg)
.jpg)
Then I covered it with moss...
.jpg)
and a piece of chicken wire stapled on to hold it all together.
.jpg)
I then poked a hole for my succulent cuttings with a knife and placed the succulents all around. I used a knife, because the pencil just wasn't making the holes big enough for my succulents.
.jpg)
My succulent plants...

.jpg)
I'm sorry that I really don't know the names of all of them. Most of them came from Home Depot, Walmart, and some local garden shops.
.jpg)
I started this project in the Fall. Doesn't it look nice?
.jpg)
I let it sit for about 6 weeks to let the roots grow, unfortunately, some of them didn't make it.

I'll have to fill it in with some more baby succulents, and I have some more... Home Depot had a new shipment of all kinds of succulents ranging from $3. to $20. So I bought some new plants for my collection on a much needed shopping therapy day with my mom. :)
 Succulents are perfect for this living piece of art, because they don't need much water or soil for their roots. It is so much fun to work with these attractive and easy to care for plants. Especially when your thumb is not always so green!


No picture?
ReplyDeleteSomehow I messed up. My daughter does the words and then I put in the pictures. Well, I was putting in the labels and first thing you know... it was published. So I just redid it with pictures. Thanks for commenting, Betty, and letting me know.. Linda
ReplyDeleteHaha! I didn't even finish with the post. It was just a draft. I guess that's a way for my mom to get me to finish my posts on time! :)
ReplyDeleteNice post! You have quite a bit of ambition! Always up to something with terrific results! Thanks for sharing!
ReplyDeleteThanks! It was really fun putting together. It's hanging now in my kitchen window. I'll have to have my mom come over and take a picture to update it. :)
DeleteThis is very nice!
ReplyDeleteI'm visiting today from Thursday's Favorite Things. :)
Thanks for visiting!
Delete